
BizTalk

Idea Probe

Projects & Plans

Recently, my neighbor completely gutted his kitchen for a complete renovation. This included flooring, cabinets, counter tops and lighting. Not one to pass up an opportunity, I asked him what he had planned to do with his cabinet doors and within a few minutes I was carrying back a stash of cabinet doors to my workshop.
I had seen some cabinet door re-purposing projects on the net and thought I would give it a shot. Find below 3 coat rack projects that I completed in a weekend using wood cut-offs and some hooks I had laying around.
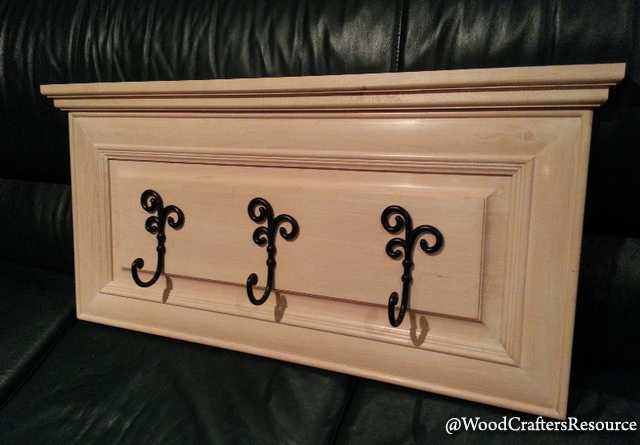
This project was the simplest one I made in just an hour or so. I added a crown molding to the top, which consisted of 2 moldings that I made from maple cut-offs that I simply glued together. I then attached the crown molding to the top with counter-sunk 1-1/2 inch screws from the top and hid the screw holes with maple wood plugs. I then attached 3 fancy hooks I had in my hardware bin. The end result looked quite elegant.
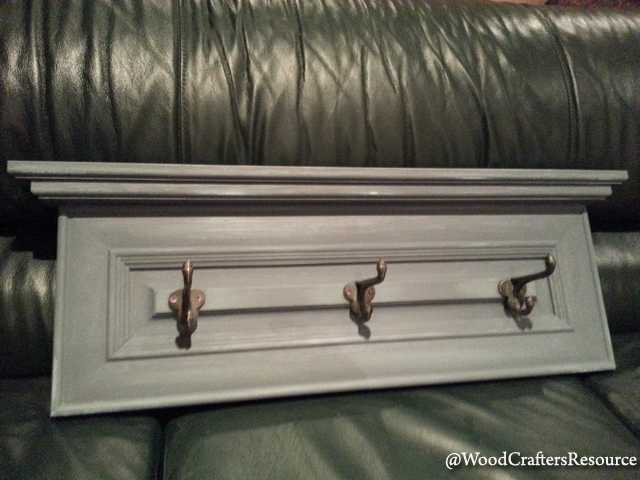
This next coat rack was made similarly to the first project, but I decided to apply a gray milk paint to match the decor of my friend's home side entrance. He seemed quite happy with the results.
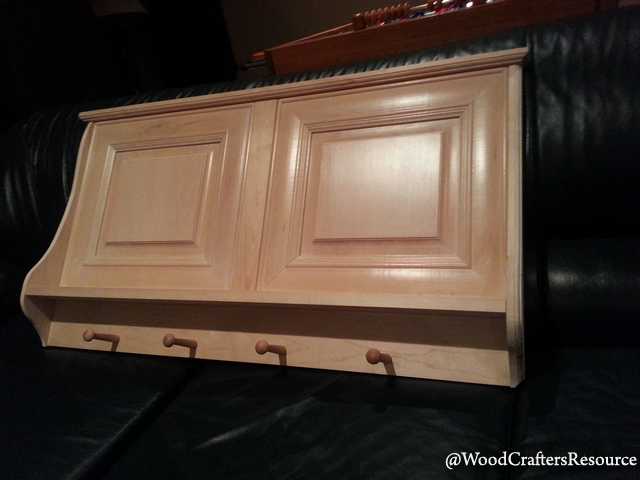
This project was more involved and took the better part of an afternoon to complete. First, I joined 2 doors to a center maple strip via pocket screws. I then attached a simple lower shelf to the bottom of the 2 doors with screws. I followed this up with a peg board and curvy sides made from maple cut-offs. The pegs came from a bulk purchase I had made a while back. A couple coats of wipe-on polyurethane completed the project. (Make your own wipe-on polyurethane)
I used a combination of 2 methods for attaching these coat racks to the wall. Since these racks would likely have to eventually hold up heavy winter coats, I wanted them to be solidly mounted to the wall. It would also be ideal if the mounting points would line up with the wood studs in the walls to provide additional holding power. So, in all cases, I arranged to have the mounting points 16 inches apart to match the stud pacing in most walls.
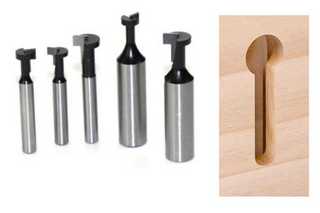
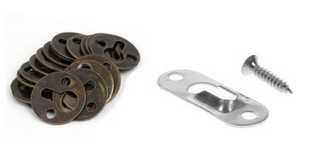
Keyhole picture frame hangers - There exists 2 varieties that require that you first use a router mortising bit to hollow out the area where the screw head will rest behind the hanger.
Keyhole router bit - The reason I like keyhole bits is that it is a one-time expense that you can keep using without having to buy more frame hangers. Make sure you plunge the bit deep enough into the lumber to provide enough support to the head of the screw before making the slot. Ensure the work piece is held solidly in place before making the keyhole. All operations with a router requires great care to avoid accidents.