Welcome to our massive guide to help you select and apply safe and natural wood finishes to the items that surround you in your home.
As the cook in the kitchen, you want to protect and seal that beautiful counter top or that cutting board that is subjected to almost daily abuse. Finishing these items to enhance their appearance, sealing them from spills, preventing warping and cracking, and keeping them clean and free from bacteria that can end up in the foods you prepare.

With babies and young children in the home who often put things in their mouths, you want to make sure that the furniture in their rooms and their favorite wooden toys are safe and non-toxic to use.
As a woodworker, you want to use finishing products that not only provide these benefits, but do so at no health risks to you in the workshop.
Within our reach, there is almost an infinite supply of different finishing products that claim to be safe to use, yet contain ingredients you can't even pronounce.
This guide will present you with natural finishing products easily found online, in your woodworking supply shops, at your local big box stores and even at your grocery store!
Table of contents
But before we proceed, a few words about toxicity.
The toxicity in modern wood finishes
Although most seriously hazardous additives, such as lead-based dryers, have been removed from wood finishes, woodworkers are often concerned about the safety of finishes sold on the market today.
There are many claims that most of today's modern finishing products are safe to use once the finishes have thoroughly cured. Some of these 'experts' stating that the fact that there have been no reported poisonings is proof enough. We will not be challenging those claims.
But, there is documented evidence of the potential health hazards that many of the commonly used solvents (or dryers) found in ready-to-use finishes can have on woodworkers while being exposed to these substances while in the workshop.
Read the product labels carefully and understand what you are buying. If you are concerned about the solvents that might be listed on the label, refer to the following link for more information: Common Solvents (Volatile Organic Compounds-VOC’s) and Their Health Hazards.
(If you decide to use products with solvents or add some to the products we will be discussing, remember to do so in a well ventilated area.)
Our objective
We will be focusing on the use of finishing products that have stood the test of time and are safe for both the woodworker and end user alike. Furniture makers from days gone by have used these products and most of them are still popular today. So, if you are concerned about the toxicity of products in your workshop or on the completed project, we have collected all the information you will need to guide you on selecting the right finishing product for your project.
Preparing your wood surface for finishing
Before you apply any kind of finish, you want to make sure that the surface is smooth and clean.
Procedure
- One of the first things you'll want to do is inspect your wood craft to determine if there are any small repairs you may want to make. Whether it is tool marks or wood defects such as worm holes, dents, knots, etc, you will either make wood patches that you will glue in place or use wood fillers to hide those smaller blemishes.
- Depending on how rough your surface is initially you will want to proceed with sanding. You should start off with 80 grit sandpaper if there are significant scratches or gouges that need to be removed. Once these have been smoothed out, you must then complete the sanding process by going from 120 to 220 grit. If you are looking for an exceptionally smooth surface, you can do a final sanding with 320 grit. Rarely will you ever need to go beyond 320 grit.
- If you plan to use stain on your wood craft, it is important that you examine your piece for any glue that may have squeezed out during assembly or repairs. Any surface glue will prevent the stain from penetrating the wood and will show up as a lighter tint. The only way to get rid of squeeze out is to scrape and then sand the surface carefully. To prevent having to clean up dried glue after-the-fact, it is best to clean the excess glue during the initial assembly with a wet rag.
- One final inspection and you are now ready to apply the finish.
Finishing
- This phase allows you to enhance the appearance and apply a protective coating to your completed project.
- The finish will not only protect your project from the occasional spill, but it will also add to the longevity of your craft by protecting it from environmental effects such as drying or swelling due to seasonal changes in humidity.
- The application of the finish varies by your choice of finish and will be discussed in their respective sections below.
- Whether you decide to apply a penetrating oil, wax or combination of the two, this can be the most rewarding process of building a craft and seeing it 'come to life'.
- It is not unusual to apply several coats of finish. But, be sure the prior coat has cured before applying more.
- Once your final coat of finish has cured, sit back and enjoy the fruits of your labor.
Your choices of natural products
So let's take a closer look at the options for finishing your projects with natural alternatives that have proven to be effective at producing safe crafts.
Follow along as we take a closer look at penetrating oils and waxes.
Penetrating Oils
Penetrating finishes and their attributes
- There are 2 varieties of penetrating oils: Drying and Non-drying oils
- Natural penetrating finishes mostly come in the form of oils derived from seeds, nuts and refined petroleum (yeah, who would have thought that there are safe things you can get from petroleum!)
- Known as reactive finishes, wood finishing penetrating oils chemically change as they are exposed to oxygen and cure. This chemical change is known as polymerization.
- As the word suggests, penetrating finishes get absorbed by the wood. Unlike film producing finishes that form on the surface of the wood, penetrating finishes will seep deep into the wood fibers and will mostly remain there.
- Penetrating finishes tend to enhance the natural tonal qualities of wood. Dark woods, such as Walnut and Cherry, will appear richer in color with a pleasing satiny gloss appearance if that's what you are looking for. Be aware that these oils will slightly discolor light colored woods such as Maple, White Oak, Birch or Ash and give them a yellowish tint.
- The level of absorption of the oil depends on the wood specie. The softer the wood, such as Pine, the 'deeper' the finish will be absorbed due to the lower density of the wood fibers
- These finishes are effective at preventing the wood from drying up over time and will even prevent woods from cracking and being affected by seasonal changes in humidity. So, as far as wood movement is concerned, if applied to all surfaces of a wood craft, penetrating finishes can add longevity to the wood craft by reducing the stresses on your joinery and providing a tight joint all year long.
- Because penetrating oils get absorbed, they do not offer much protection at the surface. That is, the wood will still be subjected to surface wear and tear and be less effective at repelling water than other kinds of finishes.
- The oil finishes we'll be discussing are considered food safe and can be applied to kitchen counter tops, butcher blocks, cutting boards, wooden utensils, bowls, cups and plates without any health hazards. Since these kitchen items are often subjected to regular clean-ups, you will have to adopt a schedule for re-applying the penetrating finishes to ensure you continue to benefit from their qualities
- There is no need to sand the wood surfaces between applications of penetrating finishes unless you are trying to remove surface damage such as from cutting marks, scratches or small dents. Here, a light sanding should suffice at eliminating these damages.
- Penetrating oils are very easy to apply. You can brush it on, soak your craft in a pool of it or use a rag. Apply the oil in the direction of the wood grain and then simply wipe off any excess after a few minutes. Wait to apply the next coat as it air dries.
- If after applying a penetrating oil you decide to go with something else such as polyurethane, you have a problem. Since the penetrating finish settles deep into the wood fibers, you will need to plane the wood to below the absorption level to get rid of it. Since this is impossible to do on most completed crafts, you are stuck with it.
- These oils have different drying times ranging from several hours to several weeks. Of course, this all depends on the humidity levels of the surroundings where it is applied, the amount of finish applied and the wood species. On average, it can take 3-4 weeks to completely cure such a finish.
Warnings about penetrating oils
 | - BE AWARE: To help reduce drying times, some manufacturers add drying agents to ready-to-use products to help speed up this process. This is where you have to be diligent in reading product labels. Many of these additives are solvents such as mineral spirits, turpentine and naphtha that in theory will completely evaporate during the drying and curing process. As mentioned earlier in this article, these common solvents are categorized as Volatile Organic Compounds (VOC's) and are considered health hazards at least during the application and drying processes.
|
 | - ALLERGY WARNING: Be aware that some nut-based oil finishes can cause some problems to people with severe nut allergies. Although penetrating oils are absorbed by the wood, leaching of the oil can occur if not completely cured. Be safe and avoid these products if nut allergies are an issue in your home.
|
 | - POTENTIAL FIRE HAZARD WARNING: As penetrating oils dry via oxidation, the process releases heat. So much so that if rags soaked in finishing oils are piled up and are not disposed of correctly, they can spontaneously catch on fire. It is therefore important to spread out the rags on a non combustible surface (such as on the edge of a metal garbage can, cement block...), to let them dry out with plenty of space between the rags to let the generated heat dissipate.
|
When in doubt, it is always best to go with the oils in their purest of forms.
Drying Oils
Linseed Oil
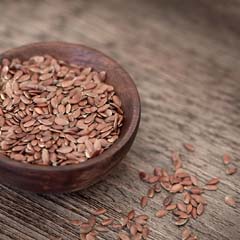
Also know as flax seed oil or flax oil at your local supermarket, linseed oil is a non-toxic oil derived from the pressing of ripened flax seeds. Available in 3 different varieties, linseed oil has been used for centuries in the finishing of wood crafts. Each format having its own unique characteristics, make sure you carefully read the manufacture label to ensure you are purchasing the kind you really want.
Raw linseed oil
- Often used as a food additive, raw linseed oil is also used as an indoor non-shrinking wood finishing drying oil that polymerizes as it cures.
- Raw linseed oil usually requires a long drying time that can take from several days to several weeks to completely dry
- Linseed oil produces a pleasing satiny finish.
- The oil is most often found as a clear yellowish oil that can cause unstained light colored woods to slightly yellow with its use.
- Known to enhance the coloration of certain woods, it is often the oil of choice for dark woods.
- Because it is a penetrating oil, linseed oil offers very little in terms of protecting the craft from spills and minor surface scratches. But it does add to the piece's longevity by protecting it from seasonal humidity changes that can often add stress to joinery affecting the overall integrity of the piece.
- Very easy to apply by either flooding the wood surface with linseed oil or by applying it with an oil-soaked rag. Any excess is then wiped off after 10-15 minutes. Do not let the excess oil dry on the piece.
- Woodworkers will typically apply 2-4 coats of linseed oil or until the piece is saturated and no longer accepts additional coats.
- Heed to the warning described above about how to best deal with used rags in preventing spontaneous fires.
Stand linseed oil
- This is a pre-polymerized version of the raw linseed oil, which is achieved by the manufacturer super heating the oil for several days in complete absence of oxygen.
- Since no additives are used in making stand oil, it remains non-toxic as it is being applied and after curing.
- Stand oil offers better coating and dries quicker than raw linseed.
- Stand oil can cost 2-3 times more than raw linseed oil.
- All other attributes are identical to raw linseed oil
Boiled linseed oil (or 'BLO')
- (We listed this 3rd variety of linseed oil to help you realize the differences in oils offered at your local paint shop. This is one of the most often found versions of linseed oil.)
- Boiled linseed oil tends to be the cheapest of the 3 formats sold.
- BLO is made by combining raw linseed oil with drying agents to speed up the curing process. These heavy metal salt additives (such as manganese and cobalt) cause an accelerated polymerization of the linseed oil allowing you to get more applications done in a shorter period.
- The metallic dryers used are known to be poisonous until the finish is fully cured. As the finish cures, these metals get trapped in the finish and are considered safe only at that point.
- As described earlier, beware of dangerous additives and potential fire hazards
Tung Oil

- Tung oil (aka China wood oil) is derived from the seeds of the Tung tree or china wood tree.
- Tung oil can often be found as an ingredient in paints and varnishes.
- If you are concerned about drying additives, look for 100% pure Tung oil.
- This oil is very similar in nature to linseed oil but with several additional benefits.
- It usually dries within 2-3 days dramatically reducing the waiting times between additional coats normally associated with the use of linseed oil.
- It is lighter in color than linseed oil causing less yellowing of the finish on light colored woods.
- It is more water resistant than linseed oil, making it a better choice on surfaces that might be exposed to some moisture.
- A light sanding is required between each coat, making the use of Tung oil and bit more laborious.
- Tung oil requires more coats than linseed oil to offer the same level of finish. It is not uncommon to apply up to 5 coats of Tung oil, but since the finish dries more quickly, the additional coats don't add too much time to the process. Wait 10-15 minutes before wiping off any excess oil.
- Tung oil is not absorbed by the wood fibers as readily as linseed oil.
Walnut oil
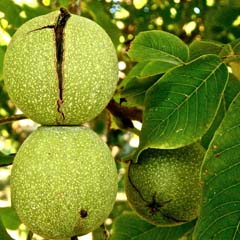
- Walnut oil is pressed from the nuts of the walnut tree.
- It offers good resistance to moisture and alcohol spills while producing a nice satiny finish.
- As is the case with Tung oil, applying walnut oil will raise some wood grain initially requiring a light sanding between coats.
- It is applied by either brushing it on or with a rag and wiping off any excess after 10-15 minutes.
- Additional coats require 1-2 days for the prior coats to dry.
- Plan on applying 3-6 coats of walnut oil depending on how much usage and exposure to moisture the item will have.
- Make sure you keep your supply of walnut oil in a well sealed container since it will cure more readily than most other oils.
- Be aware of potential nut allergy issues.
Other drying oils
Teak oil
- It is best to use the all natural version with no additives.
- Provides UV protection from the sun and is the preferred protective finish for exterior teak furniture.
- It produces a warm natural appearance but does change color over time.
- The naphtha often found in Teak oil has been reported as poisonous to pets, so be careful here.
- There isn't much information available if it is considered food-safe.
- We would hesitate to use this product on wooden food preparation items.
Danish oil
- Depending on the manufacturer, Danish oil is often made with Tung or linseed oil as a main ingredient.
- Since formulations vary greatly between manufacturers, it is best that you read the label carefully.
- Pay particular attention to the solvents and other drying agents used such as metallic salts that may have been added to the mixture to speed up drying times.
Non-drying oils
Mineral oil (food-safe)
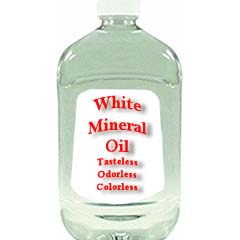
- Although not considered to be a 'natural' substance, we chose to include food-safe mineral oil due to its existing wide usage and food safe designation.
- Food-safe mineral oil is derived from petroleum and is entirely safe for human consumption. As a matter of fact, it is available at your local drugstore as a laxative. Also marketed as 'White Mineral Oil'.
- Mineral oil is colorless and odorless.
- Mineral oil is applied in the same way as the other oils described above.
- This oil will penetrate the wood fibers but is not a curing oil. It will retain its liquid form and will not polymerize like the 3 oils described above.
- Since it doesn't really dry or harden, it offers the least amount of protection to your wood craft and requires frequent re-application.
- The matte finish it produces tends to slightly camouflage light surface scratches.
Vegetable-based oils (to be avoided for wood finishing)

From your kitchen cabinet:
- It is not uncommon to see recommendations on the use of vegetable-based oils as a wood finish or wood 'rejuvenator' - don't do it!
- These oils are mostly of the non-drying variety containing fats that will go rancid with time causing a foul odor.
- The oils to avoid include corn oil, sesame seed oil, canola oil, olive oil, peanut oil... you get the picture!
A few words about coconut oil
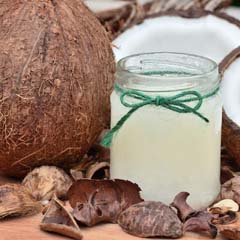
- Applying coconut oil is often recommended on cutting boards, butcher blocks and counter tops.
- The natural fats contained in regular coconut oil eventually go rancid and will give off an odor.
- If you want a 'better' coconut oil, select distilled coconut oil that has had these fats removed.
- Check the label for terms such as 'distilled', 'steam distilled' or 'fractionated' coconut oil.
- This version of the oil is considered to be superior to other oils commonly used on food preparation items and will not go rancid.
- This oil can be combined with waxes to provide better application, sealing and protective properties.
Waxes
Wax finishes and their attributes
- Wax finishes mostly come from bees and trees.
- Due to the hardness of waxes, they are almost always combined with penetrating oils and other waxes to make them more manageable.
- Waxes are a surface finish that offer a mild level of protection and are easily affected by spills, wear and heat.
- They are rarely used as a primary finish and are more often applied over penetrating oils as a form of sealer and topcoat that can be polished.
- Waxes are easy to apply. (In the 1984 movie "The Karate Kid", Mr. Miyagi told his young student "Wax on, right hand. Wax off, left hand. Wax on, wax off. Breathe… in through nose, out the mouth. Wax on, wax off. Don't forget to breathe. Very important. Wax on, wax off. Wax on, wax off.")
- Natural waxes will not affect the tonal qualities of the wood.
- As in the penetrating oil finishes described above, re-applying a wax finish to a worn surface is straightforward.
- BE AWARE: As is the case with penetrating oils, some commercially available waxes are combined with solvents to produce a more easily applied paste wax. These products classify wax finishes as an evaporative finish, which when applied in this form will harden once the solvent has evaporated leaving behind the wax finish only. If you are concerned about the solvents listed on the label, refer to the links provided in the section on toxicity.
- Also be on the look out for silicone that may have been added to a commercial paste wax. These waxes can affect the effectiveness of your glue if applied before assembly.
Beeswax
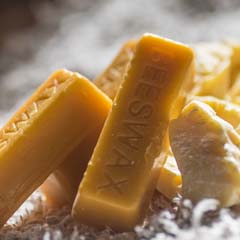
- As you probably guessed, beeswax is derived from the honey bee.
- It is the softer of the waxes we will be discussing.
- Available in solid form, beeswax is applied by first softening it into a buttery paste. Since it cools quickly, you need to keep the wax warm during the application.
- Used on its own, beeswax tends to produce a satiny finish.
- Beeswax is most often combined with a penetrating oil to keep it in a paste form providing additional resistance to moisture and ease of use.
- The paste can be applied using a soft rag or fine steel wool.
- Application: Only apply thin layers of wax at one time. Apply your first coat of wax in a circular fashion to fill all the wood pores. Let the wax dry for 15-20 minutes and buff with a clean dry cloth removing any visible accumulations of wax. Apply the second coat in the direction of the wood grain and let it dry followed by an additional buffing. Once this last coat has dried thoroughly, follow that up with a final buffing to achieve a higher level of 'glossy-ness'.
- When combined with a penetrating oil, beeswax can be buffed to a higher gloss.
- Beeswax offers a moderate level of protection, and requires more frequent re-applications if the piece is exposed to moisture or daily wear and tear.
- Periodic re-application of the protective wax usually only requires a thin coat and light buffing.
- Beeswax can be applied to stained wood, but makes it difficult to repair and stain deep scratches unless the wax is completely removed.
- Some beeswax comes with a slight tint that allows you to hide slight discolorations that may have occurred with the piece. But the color is impregnated into the wax and will remain on the wood surface and is not absorbed by the wood fibers.
- Once applied to a craft, beeswax cannot be sanded. It is best to scrape off the wax and use a solvent to remove any remaining traces.
Carnauba wax

- Carnauba wax is the king of natural waxes and is used in many wood finishing and car polishing formulas.
- It is extracted from the leaves of the Carnauba wax palm tree and is refined to its purest form.
- It is one of the hardest waxes and is more resistant to moisture and wear than beeswax.
- Because of these properties, carnauba wax can be buffed to a glossy shine.
- It is best used in combination with a penetrating oil and other waxes to keep it in a paste form.
- Apply this wax in the same way as described for beeswax.
Food-grade Paraffin
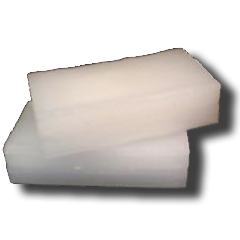
- Similar to mineral oil, paraffin is derived from distilled petroleum.
- Food-grade paraffin is safe to use on wood surfaces and is often used as a sealant for preserving jams and cheese.
- As a wood finishing wax, it is most often combined with other waxes and penetrating oils.
- In the workshop, paraffin is often used to lubricate drawer slides and any other high friction surfaces.
Other natural products
Working with Shellac
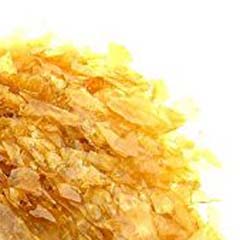
- Shellac is derived from secretions from the lac bug and is considered safe.
- Normally sold as flakes, these require that they first be dissolved with a solvent (typically denatured alcohol) in various ratios depending on the particular application.
- Although considered food safe once it has completely cured and is commonly used on children's toys and furniture, its weak resistance to moisture makes it a less viable finishing option on food preparation items.
- Denatured alcohol, the solvent used, is considered to be a chemical containing high volatile organic compounds (VOCs).
- Since the focus of this article is on the use of natural products and their safety to woodworkers and end users, we will not be including shellac as a natural and safe to use wood finishing option.
- We will be reviewing shellac in more detail in an upcoming article... So, stay tuned.
Mixing your own safe natural wood finish blend

The wood finishing substances we've discussed have their own individual merit in the workshop. Combining these products to produce a custom blend allows you to take advantage of the various benefits that each substance has to offer.
The nice thing about blending your own finish, is that you can modify the formula to adapt it to your particular needs while keeping them safe and natural. You can even modify an existing blend by simply re-melting the paste and adjusting the ingredients as needed.
Before we look at the recipe, let's define our objectives.
We want a finish that will...
- Seal the wood to prevent it from drying and cracking
- Be easy to apply
- Offer water resistance
- Be food safe
- Fill small scratches when applied
- Polish to a high gloss
- Not yellow light colored wood
- Provide a protective coating
By looking at our list of natural finishes, we have decided to go with:
- Tung oil:
- We prefer a drying oil for our project
- Provides a good medium to dissolve our waxes to keep them in a paste form.
- Is more water resistant than the other drying oils.
- Cures more rapidly
- Will not yellow light colored woods
- Will help our paste penetrate the wood fibers to provide more protection
- Carnauba wax:
- A tougher wax and we want that for durability
- Can be buffed to a high gloss
- Offers superior water resistance
- Beeswax:
- Since carnauba wax is so much harder than the other waxes, we wanted to add a secondary wax to keep our paste a little softer and therefore easier to apply.
After some experimentation, we produced the following recipe as a starting point.
Ingredients
- 1/4 cup Beeswax
- 1/4 cup Carnauba wax
- 3/4 cups Tung oil
Prep materials needed
- Knife (for cutting up the beeswax)
- Cheese grater / shredder (for shredding the carnauba wax if necessary)
- Double boiler, crock pot or improvised double boiler (for melting our blend)
- Stir stick, Popsicle stick, tongue depressor (for stirring things up)
- Oven mitts (to make things difficult for you)
- Pliers (don't want you burning yourself)
Preparation
- Note: This recipe yields about 10 fluid ounces of paste wax. You can easily adjust the ingredients to produce the quantity that you need.
- Cut up the beeswax with the knife into small pea-sized pieces.
- We used powdered carnauba wax since it is easier to work with, saves us the step of shaving the block of carnauba wax with a shredder and will melt more quickly.
- The 3 ingredients must then be combined to be melted using one of the 3 options listed below:
- Option 1: Use a double boiler to melt the ingredients together. Once the wax begins to melt, stir the mixture to get the ingredients blended into a nice smooth paste.
- Option 2 - Crock pot - Go easy with the heat settings and keep an eye on the mixture as it melts. Stir the ingredients until you get a uniform blend.
- Option 3 - Improvised double boiler: We didn't have access to a double boiler and we were looking for a solution that would require no cleaning.
- Put the mixture into a large tin can. We used a coffee can since it was large enough to hold the mixture and came with a plastic lid that we could use to store the paste wax afterwards. No messy cleanup or need to transfer the blend into another container.
- Insert the can into an empty pot.
- Fill the pot with water to about 2/3 of the height of the mixture that is in the can. You don't want water to splash into the mixture as the water boils.
- Slowly bring the water to a boil and lower the heat enough to prevent the water from 'bubbling' too much making the can bounce around.
- Using oven mitts and pliers (be careful not to burn yourself), hold the can in place as you stir the mixture slowly with a wooden stick. Be careful not to tilt the can.
- Keep stirring until the mixture appears completely blended.
- Once the paste is a uniform texture, remove from the heat source.
- Transfer the mixture to a container (for heating Options 1 and 2)
- Stir occasionally as it cools to prevent the oil from pooling at the top.
This will produce a nice paste wax that you can then apply to the wood surface. If you want a harder film finish, add more carnauba wax to the recipe, reheat the paste, add a bit of Tung oil to replace what may have evaporated and test. It's that easy!
Follow the application techniques as described in the section for beeswax and buff the paste as needed once the paste has skinned over.
Hope you enjoyed this article and happy crafting!


 Tips & Tools